
One repair journey, from investigation to the finish
A leak can leave you with a damaged room and an incomplete explanation. Premier brings together leak detection, drying, strip-out and reinstatement so the cause, condition of the building and replacement finishes can be considered as one repair journey.
We work on escape-of-water damage, flood damage and storm damage. Whether you have just discovered the problem or already have a repair schedule, tell us where the property is and what stage you have reached.
REAL PROJECT EVIDENCE
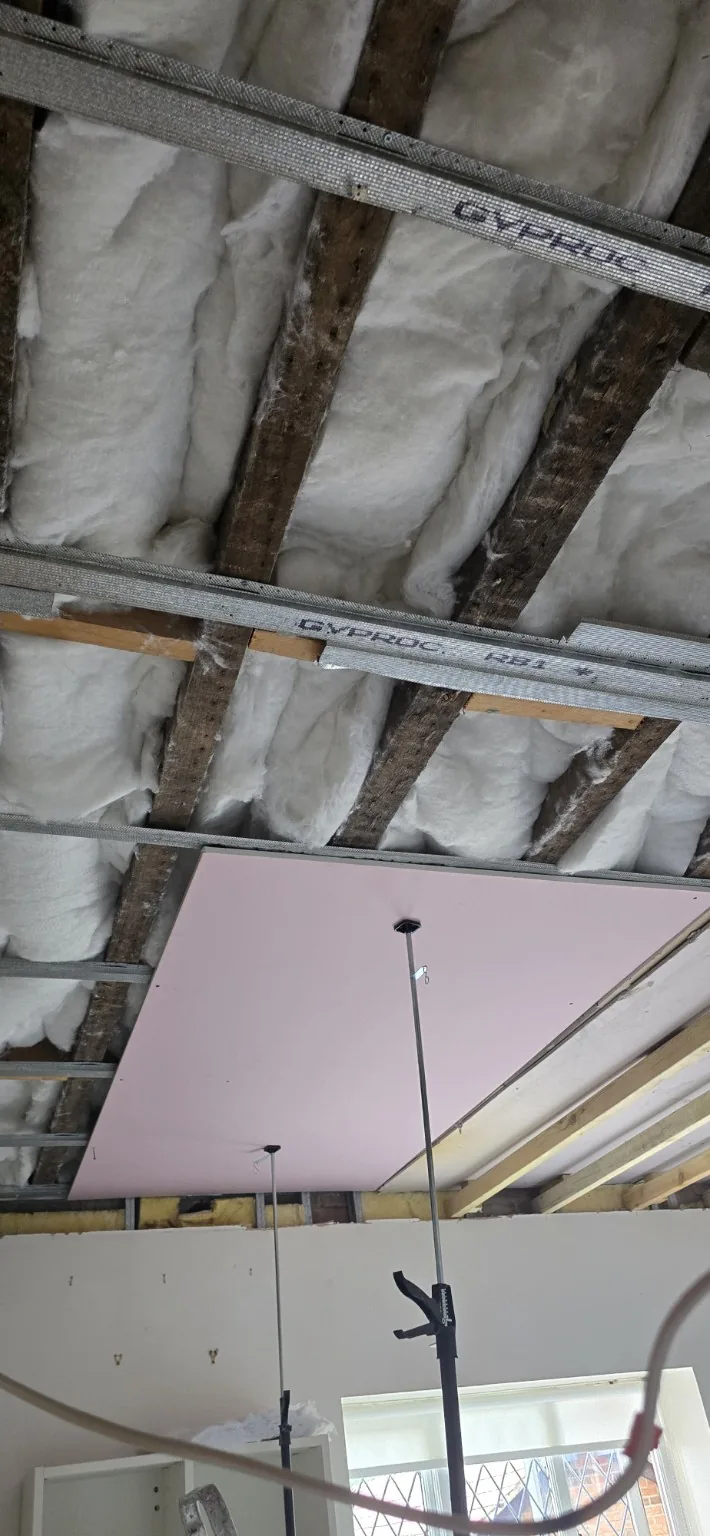
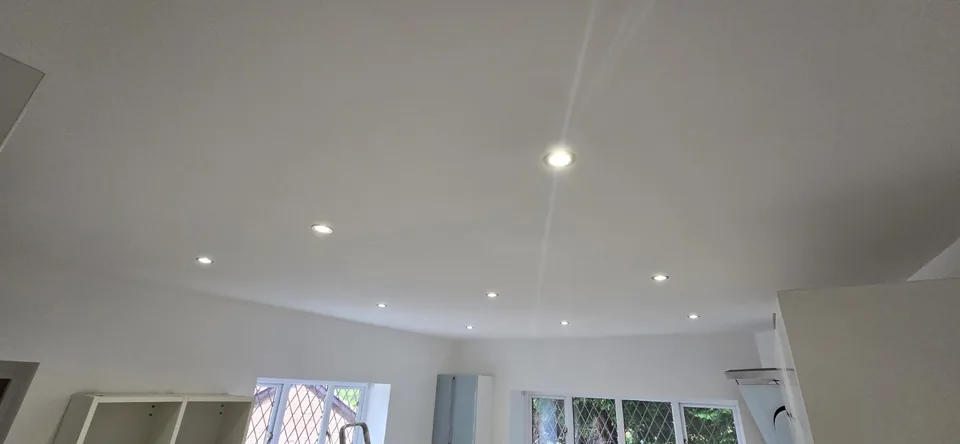
Rebuilding a kitchen ceiling in Altrincham
A leak upstairs caused a ceiling collapse. These photographs show the rebuild and finished ceiling; Premier also dried the kitchen.
Start with what you know
You do not need to diagnose the fault or produce a specification before contacting us. Send the postcode, affected rooms, when you noticed the damage and whether water is still appearing. Photographs and any earlier contractor findings help us understand what needs checking.
Use the damage-report form to send your enquiry and photographs without creating an account. If attendance is urgent, call 0330 633 0025 to discuss availability.
Agree each stage before moving forward
- Survey and investigation: establish the damage and any unresolved source. Leak detection and trace and access can form part of the instruction where the cause is concealed.
- Scope and quotation: identify the work, proposed finishes, assumptions and exclusions. Name the person approving the quotation and any later changes.
- Preparation and repair: agree access, strip-out, drying and the sequence of reinstatement work appropriate to the property. The affected materials need to be ready before replacement finishes are fitted.
- Completion: review the agreed work, record anything requiring attention and discuss the handover information you need.
Insurance repairs and improvements
We undertake insurance reinstatement and privately arranged repairs. If there is a claim, send the agreed schedule or tell us who is handling it. Keep the repair instruction, insurer decisions and responsibility for payment clear before work starts.
An insurance repair can also be an opportunity to make a separately funded improvement. In our Worsley bathroom project, two leaks had damaged the floor and a full bathroom replacement was carried out. The customer added their own funds to the insurance payout for a substantial upgrade. The case study shows the preparation and completed bathroom.
Your own policy and insurer determine cover and settlement. Our cash settlement and repair guide helps you organise the questions before deciding how to instruct the work.
If someone else lives in the property
For a rented home, identify the landlord or agent who can approve the work and the occupier who can arrange access. Explain any restrictions affecting the rooms, fixtures or working hours. Agree how appointments and repair updates will reach the tenant, so a permission or access problem does not hold up the next stage.
If an agent manages the repair for you, share our property-manager information with them.
Send us the next useful piece of information
Our base is in Rossendale. We serve core locations across Greater Manchester and assess enquiries elsewhere in Lancashire by postcode and the work required. Start with your location and a short description; we can then discuss the appropriate assessment or repair instruction.
Prepare for your repair enquiry
Bring a clearer record of the damage, responsibilities and work you want assessed.
More homes repaired after leaks
Failsworth: a bathroom rebuilt and upgraded after a tank leak · Altrincham: a kitchen ceiling rebuilt after a leak upstairs · Manchester: bedroom reinstatement after another company’s drying.
Find the repair you need
A water-damaged ceiling
From staining and damaged plasterboard to rebuilding a collapsed ceiling.
See the next stepsA leak from the flat above
Help with the damage in your home, access and the work still needed.
See the next stepsRepairs after drying
The leak is fixed and the room is dried. Now put the walls, floors and finishes right.
See the next steps